What are the AboutWebsites.ca Name Servers (DNS)?
In order for your website address to point to your site on our servers, you need to change your DNS.
Good news is that changing the dns settings for your domain name at your registrar where you purchased the domain is fairly simple.
Usually the registrar like Godaddy will have a control panel you would login into and then you would go select the domain name on the account and chose to change/modify the name servers. Sometimes it will ask for “Custom” Name servers like it does in Godaddy. You would then update the name servers with the dns settings below.
If there are more fields than the primary and secondary name servers, like a third or fourth name server field leave those blank.
You can also contact your registrar where you purchased the domain or contact the hosting company where you may have had the domain purchased with a previous hosting account and ask them to update the name server records for you.
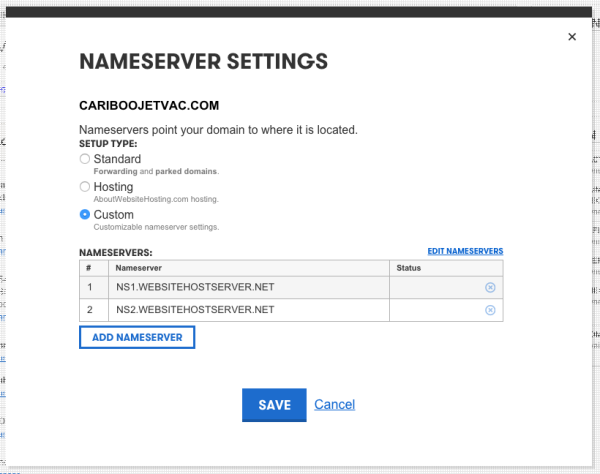
DNS Settings:
How to Change DNS on GoDaddy:
How to Preview Website Before You Change DNS:
See (stage) your website before switching your DNS
When customers are looking to switch hosting providers, they usually stage the setup of their web site before completely switching the DNS (domain name servers). We provide you with a temporary URL so that you can see how your site will look before you switch your domain’s DNS. The problem comes when some scripts require you to access the script through a valid domain name. This poses an issue because you haven’t switched the domain’s DNS and don’t want to until you know the script works 100%.
Here is an easy work around:
1) Upload your site / databases, etc to your new web hosting account with AboutWebsites.ca
2) Locate your hosts file on your computer: On MAC, hosts is located Go –> Go to Folder –> /private/etc/hosts
Windows XP, hosts is located at C:\WINDOWS\SYSTEM32\DRIVERS\etc\HOSTS) and add the following line at the end of the file:
IP_ADDRESS www.yourdomain.com yourdomain.com
Obviously change the IP_ADDRESS and yourdomain.com to the appropriate values. The IP_ADDRESS can be found in your welcome e-mail and also inside of your cPanel account.
3) Hit save, close all your browsers. That’s it.
Now when you load your web site from your computer, you will be able to see your site as if the DNS was pointed to our servers. You can fully stage the setup and ensure all components of your site are in working order. The rest of the world will still be loading from your actual server (since you did not change the domain’s DNS). You can remove the line in the hosts file whenever you’re done staging and your computer will reference your ISP DNS servers as usual.
How do I check my e-mail via Webmail?
Checking your e-mail via webmail can be done many ways. You can use our webmail clients by navigating to: http://webmail.yourdomain.com/ or http://www.yourdomain.com/webmail/
*Please ensure that you change “yourdomain.com” to your actual domain name.
How do I set up my AboutWebsites.ca Email?
How to Set Up Outlook Email
This lesson will teach you how to configure your email with Outlook.
Step 1: Open Outlook

Step 2: Add An Account

Click on File and press the Add Account button.
Step 3: Input Account Information
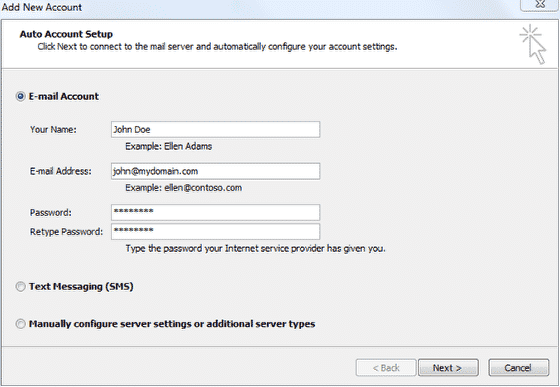
Under Your Name enter your full name. Under Email Address, enter your full email address Type in the password for your email address
Step 4: Click Next

Step 5: Manually Configure Settings

Outlook will try to automatically determine the mail server information. If it is not able to, select manually configure server settings.
Step 6: Select Internet Email and Click Next

Step 7: Input Server Settings
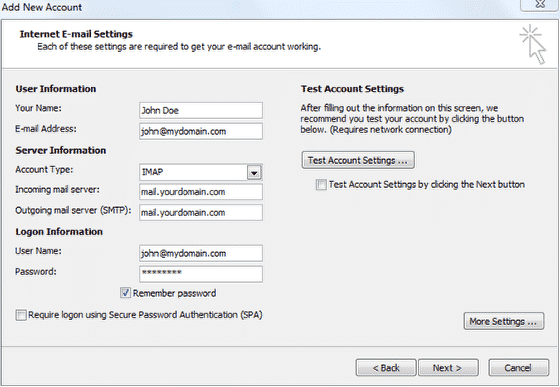
Input the server settings on the next page
Step 8: Click More Settings
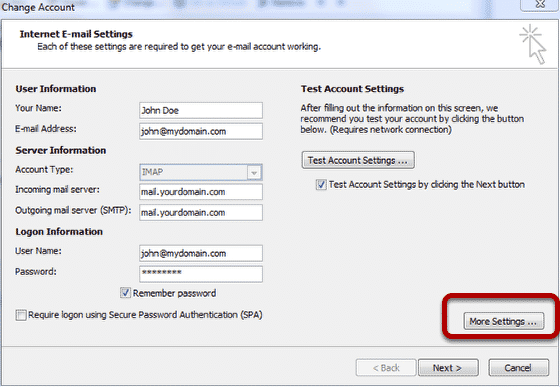
Step 9: Configure Outgoing Mail Settings

In the outgoing server tab, ensure you have selected “My outgoing server (SMTP) requires authentication”. Login using your email address and password.
Step 10: Configure Mail Ports
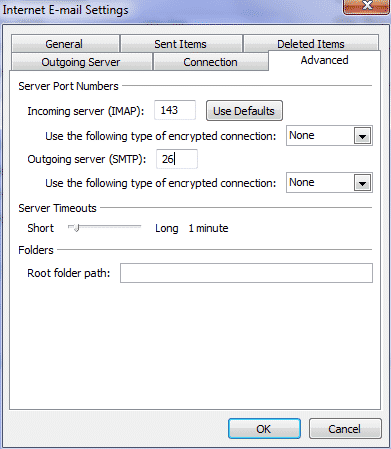
Ensure you have selected port 26 for the outgoing mail server. Encryption should be set to none on both servers.
You’re Done!
Your email should now be setup and working for you! Please contact support if you are unable to send or receive email.
How to Set Up Apple Email
How to setup your email using Mac Mail.
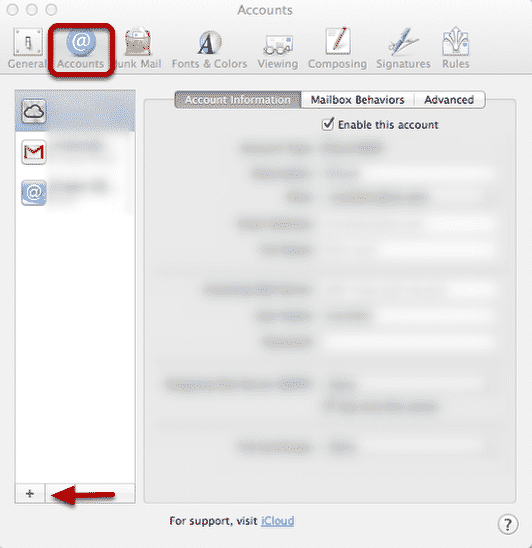
Step 1: Open Preferences Menu

Step 2: Create New Account
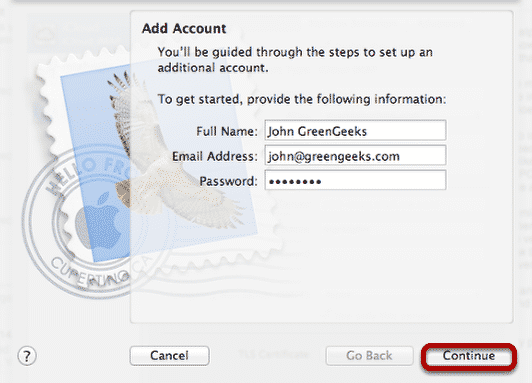
Step 3: Enter Account Information
Step 4: Enter Incoming Mail Server Information

Step 5: Click Continue

Information on this page can remain the same. SSL should remain unchecked and authentication should be password.
Step 7: Enter Outgoing Mail Server Information
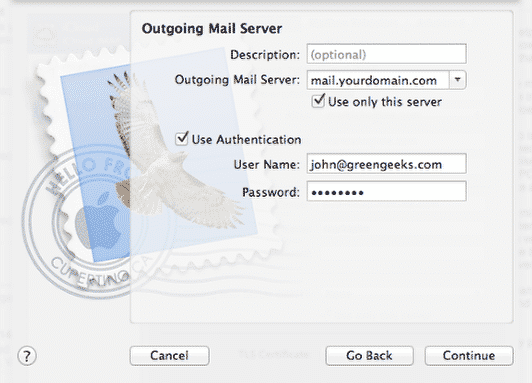
Enter the outgoing mail server information. Use authentication should be checked, and you should use the email address and password as the login crdentials.
Step 8: Click Continue

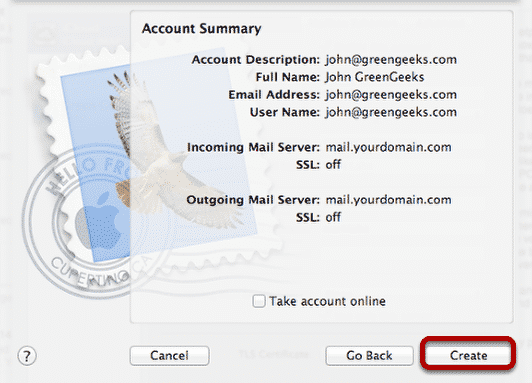
Step 9: Click Create
Step 10: Update outgoing mail server port
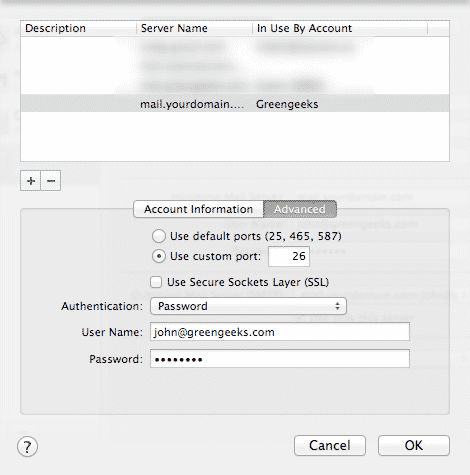
Go back to the account page and click “Edit SMTP server list” Update the outgoing mail server port to be port 26 and click OK.
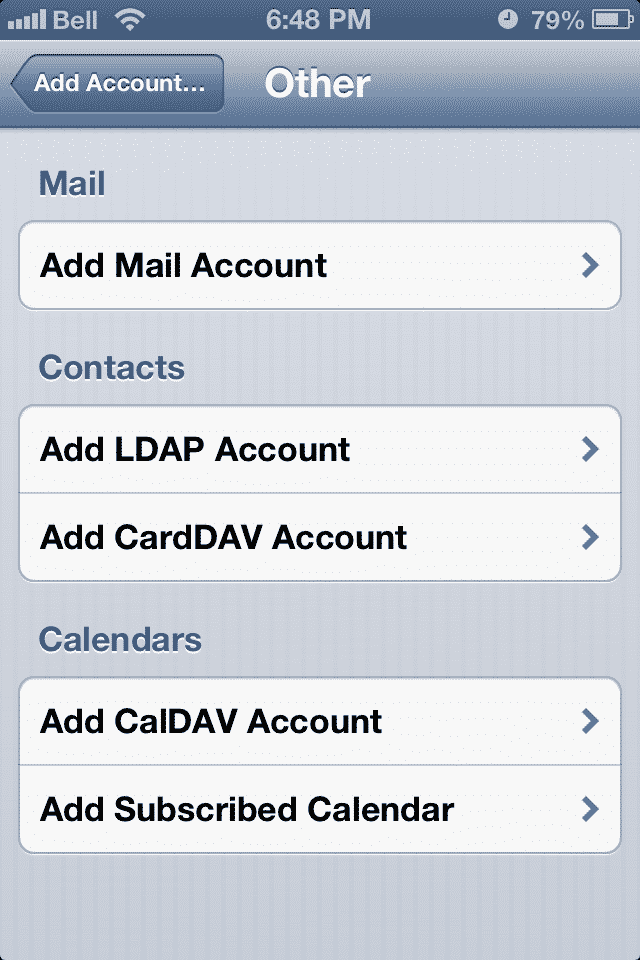
How to Set Up iPhone Email
Bellow are the instructions for setting up email on the iPhone:
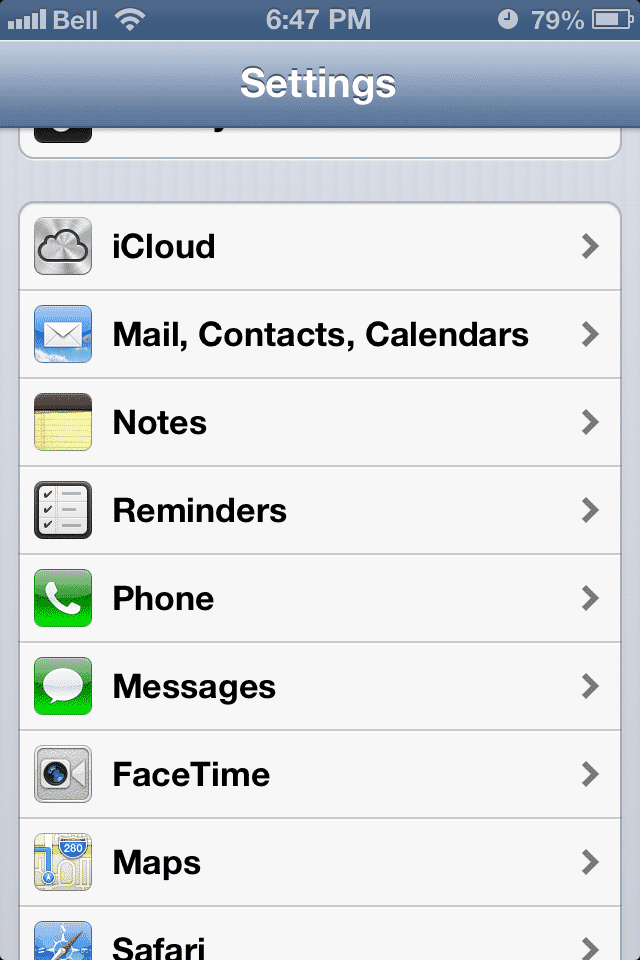
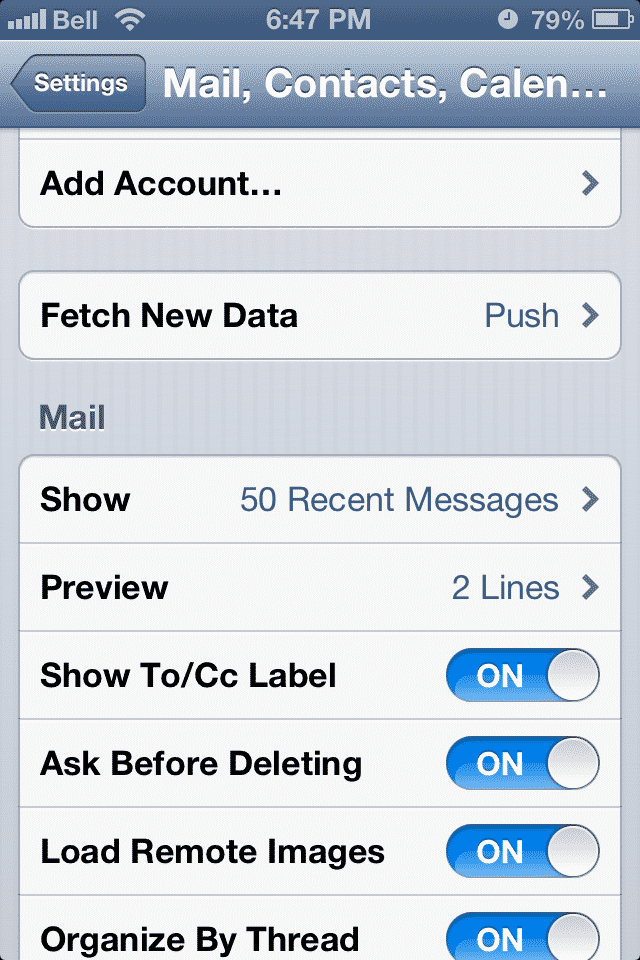
Go to the settings menu on your phone and click on the Mail, Contacts, Calendars section.
Click on Add Account
Select Other

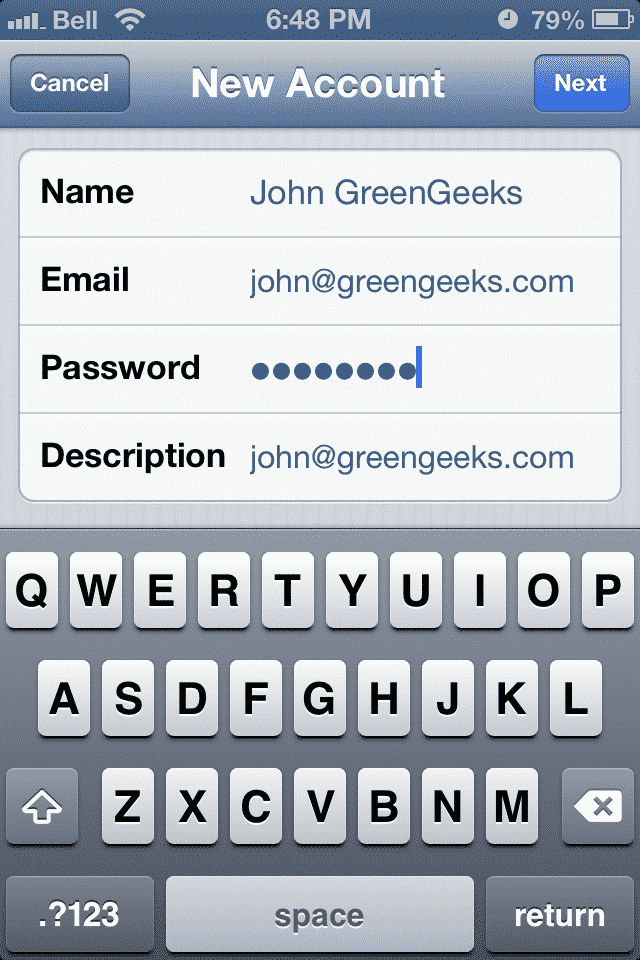
Select Add Mail Account
Fill out the information in this screen.
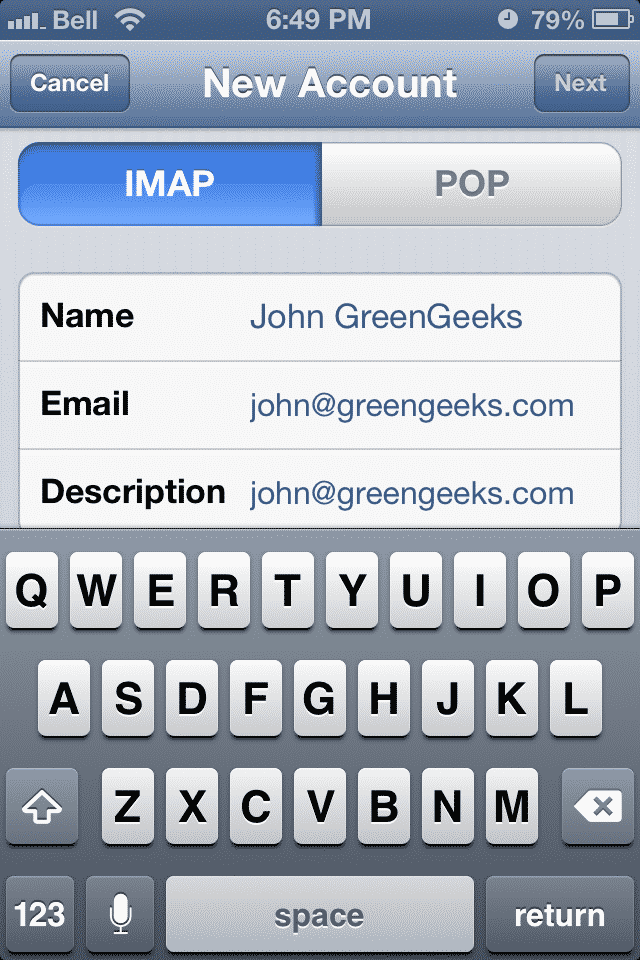
Select the type of email account you would like. We suggest IMAP for checking email on the iPhone.
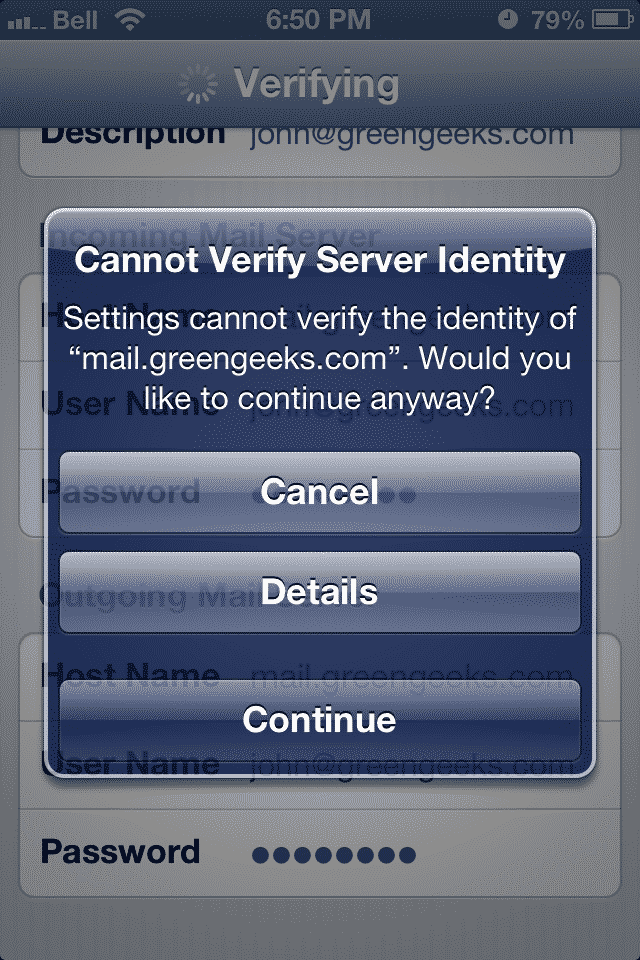
Enter the incoming server information. The mail server is mail.YOURDOMAIN where YOURDOMAIN is the domain on your account with us. Make sure to enter the full email address for the username. Remember, do not use mail.www.greengeeks.com as your mail server. This is NOT correct!

Enter the outgoing mail server. It has the same settings as the incoming mail server.

Select Continue
Select Save
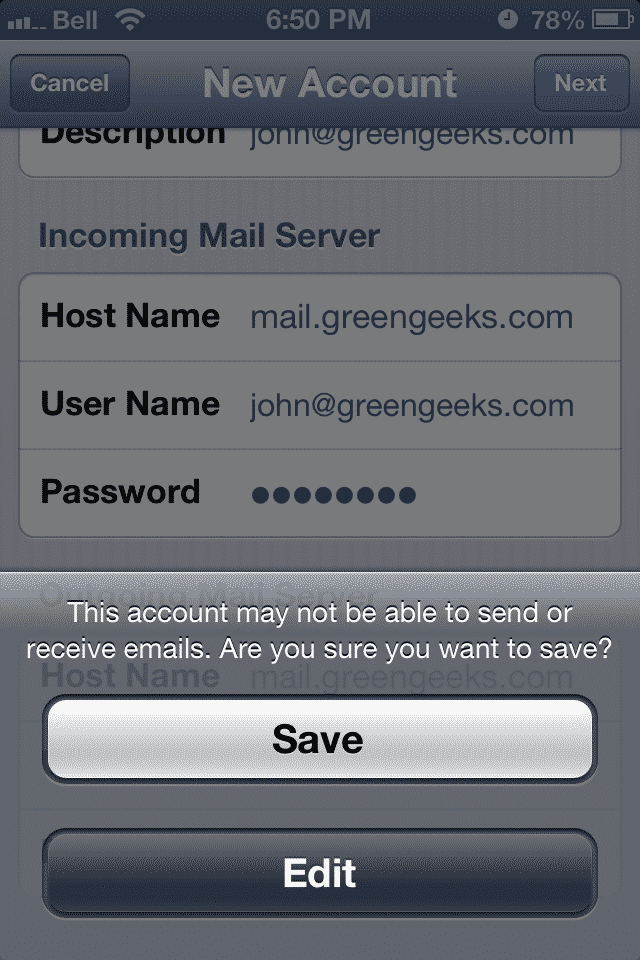
Make sure to go back into the settings of the account and turn off SSL. Select custom port 26 for the outgoing mail server port. Select authentication as password.

Your email account should now be setup. Please contact support if you are having any issues.